Entering the realm of onyx stone installation is an adventure into precision and elegance, capable of elevating any environment with its sophistication. Selecting the ideal onyx stone, applying epoxy accurately, and crafting delicate veins demand a combination of technical skill and creativity.
For beginners eager to learn, understanding the nuances of techniques such as fogging, colour melting, and vein creation is crucial for a flawless installation. This guide aims to demystify the process, offering insights into the artistry behind the captivating beauty of onyx stone installations.
Types of Onyx Stone
When we chat about the different types of onyx stone, it's really cool to see how their unique characteristics and colours set them apart. You've got your black onyx, green onyx, white onyx, and honey onyx. In the realm of interior design, onyx stone is quite the catch for adding that splash of luxury and uniqueness to any space. Especially for kitchen countertops, onyx stone stands out with its gorgeous veining patterns and the ability to be backlit, creating breathtaking effects.
Black onyx is the go-to for anyone looking to make a kitchen look more upscale. Its deep, rich colour makes kitchen countertops pop, making a strong statement. Then there's green onyx, which brings a chilled-out, organic feel to your cooking area, perfect if you're aiming for a peaceful vibe. White onyx is all about class and elegance, lighting up your kitchen with its soft, light beauty. And let's not forget honey onyx, which adds a cosy warmth and depth, making your kitchen feel extra inviting. Each type of onyx stone offers something different, depending on your style, making it a flexible choice for your kitchen.
Why does this matter? Well, choosing the right onyx stone can completely transform your kitchen. Imagine cooking and entertaining in a space that feels exactly like you want it to – whether that's classy, cosy, or somewhere in between. It's all about creating a space that you love.
Tools Needed for Installation
Essential Tools for Onyx Stone Installation
When it comes to installing onyx stone, the right tools can make all the difference. You'll definitely need a wet saw equipped with a diamond blade. This isn't just a fancy tool; it's crucial because onyx stone is both hard and prone to cracking. Cutting it without the proper equipment could end up in a wasteful disaster.
A level is your best friend for keeping everything straight and even. It's not just about making sure your installation looks good; it's about ensuring stability and preventing any unwanted unevenness that could spoil the overall effect.
For applying adhesive, grab a trowel and a notched trowel. These aren't just any tools; they're your ticket to creating the perfect grooves for adhesive, which means your tiles won't just stick; they'll stay stuck.
Then, there's the grout float and a sponge. After you've laid down your tiles, these tools help in applying and cleaning up grout, leaving you with a neat, polished finish. It's all about the details, and these tools help you nail them.
Preparing the Installation Surface

Ensuring Your Onyx Stone Sticks Around for the Long Haul
Getting your surface ready for an onyx stone installation isn't just about ticking boxes; it's about making sure your stunning stone stays put and looks good for years to come. Let's chat about how to get that surface in tip-top shape.
First off, cleaning is key. You wouldn't paint over a dirty wall, right? Similarly, any dirt, dust, or other bits and bobs on your surface can mess with the adhesion of your onyx stone. So, give it a good scrub and make sure it's sparkling.
Next up, we need to talk about the surface itself. Imagine trying to build a house on a wonky foundation; it wouldn't end well. The same goes for your onyx. The surface needs to be flat and smooth, so take the time to check and fix any bumps or dips.
Now, let's get into the nitty-gritty – the primer or bonding agent. Think of this as the secret sauce that makes your onyx stick. Not all bonding agents are created equal, so look for one that's specifically made for onyx. This will help your stone adhere better and last longer.
Lastly, patience is a virtue, especially when it comes to drying. If the surface is even a tad moist, you're asking for trouble. Moisture can lead to all sorts of issues down the line, so ensure the surface is bone dry before you start laying down your onyx.
Step-by-Step Installation Process
Preparing the Surface and Applying Adhesive
Before you get started with placing your onyx stones, you need to spread a thin layer of adhesive or mortar on the back of each piece. It's crucial because this ensures that the stones will stick properly and stay put. Imagine spreading butter on toast – you want it even and covering the whole slice. That's exactly how you should apply the adhesive to your stones.
Spacing is Key
Now, spacing the onyx stones correctly is super important if you're aiming for that sleek, professional look. This is where spacers come into the picture. They help keep each stone the same distance from its neighbours, avoiding any awkward gaps or overcrowding. It's a bit like making sure all the cookies on a baking sheet have room to spread without sticking to each other.
Securing the Stones
Once your stones are in place, give them a gentle tap with a rubber mallet. This step makes sure they're snugly fitted into the adhesive or mortar, kind of like tucking them into bed. You want them level and secure, so they look perfect and are safe to walk on or touch, depending on where you're installing them.
Letting It Cure
Patience is a virtue here. You've got to give the adhesive or mortar enough time to cure, following whatever the manufacturer recommends. It's a bit like waiting for paint to dry – rushing it just leads to a mess.
Finishing with Grout
The final touch is grouting the joints between your onyx stones. This not only completes the look but also seals the deal, so to speak, protecting your installation from moisture and dirt. It's the icing on the cake that gives your project that polished, finished appearance.
Maintaining and Caring for Onyx Stone

Keeping Your Onyx Stone Sparkling
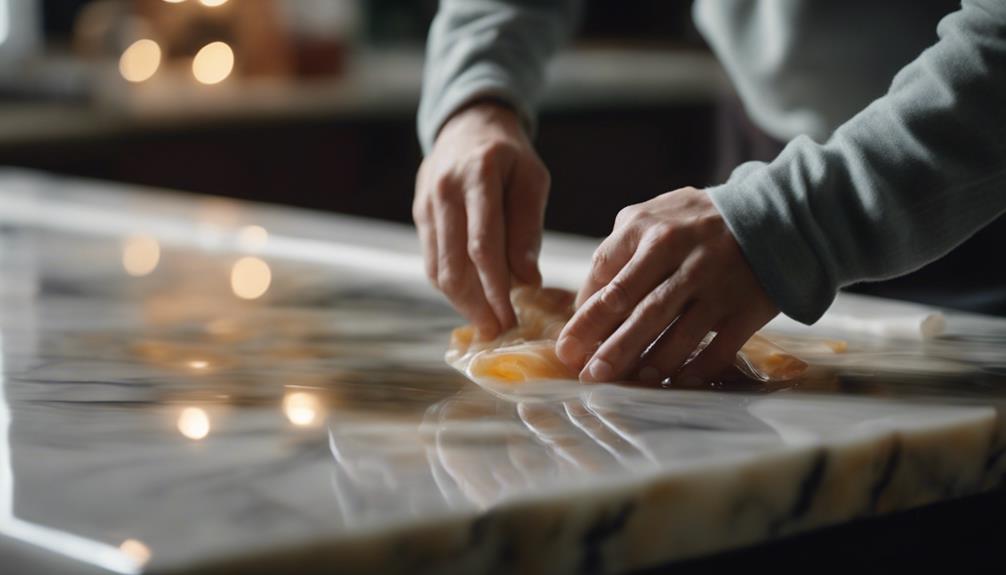
To keep your onyx stone looking as gorgeous as the day you got it, there's a bit of upkeep needed. But don't worry, it's nothing too taxing! Firstly, make it a habit to wipe down your onyx surfaces with a gentle soap and water mix. This simple step stops dirt from building up and keeps that shine we all love.
Steer Clear of Harsh Chemicals
Now, onyx might look tough, but it's actually pretty sensitive. Harsh cleaners or anything abrasive are a big no-no. They can scratch or etch the surface, ruining that smooth, glossy finish. It's like using sandpaper on silk; you just wouldn't do it, would you?
Seal the Deal
Why seal your onyx stone worktops every year? It's all about protection. A good penetrating sealer acts like an invisible shield, keeping out stains and moisture that can do damage over time. Think of it as sunscreen for your stone, helping it stay safe from the elements.
Mind the Heat and Scratches
Ever put a hot mug directly on a wooden table and left a mark? The same goes for onyx. Those beautiful surfaces can get scratched or damaged by heat quite easily. Simple fixes like using coasters or trivets can save you a lot of heartache and keep your onyx looking perfect.
Conclusion
At the heart of it, getting onyx stone installation just right is all about paying close attention, being exact in what you do, and really understanding the tricks of the trade. If you're just starting out, you can absolutely create stunning and true-to-life results by following the steps we've laid out in this guide. With the proper equipment, getting things ready beforehand, and looking after it all once it's in place, onyx stone can bring a special kind of beauty and sophistication to any area.
Imagine transforming a room into a breathtaking space that catches everyone's eye – that's the magic onyx stone can offer. However, we understand that this process might seem daunting at first. That's why we at Allstone Solutions are here to lend a hand. Whether you're puzzled about the right tools, how to prepare, or the best way to maintain onyx stone, we've got your back. Our expertise doesn't stop at onyx stone; we're also pros at Granite Installations, Marble Installations, CNC Stone Engraving, Engineered Stone, and providing all the Installation and Maintenance Info you could need.
If you're feeling stuck or unsure at any point, don't hesitate to Contact Us. We're keen to help you navigate through any challenges you might face. Remember, achieving that perfect finish is possible, and we're here to ensure you get there.
And, if you're in the market for a more tailored solution, we invite you to request a quote from us. At Allstone Solutions, we're dedicated to bringing your vision to life with precision and flair. Let's make your space extraordinary together.


